DUDE! Get On That Already!: Making a DIY Pot Rack
You know those projects that have been hanging on your to-do list so long you barely recognize them as words anymore? Those things you leave shut tight behind a closed door hoping one day they will fix themselves or just disappear? Dude! Get On That Already! The challenge created by the good folks at Young House Love, to clean out those spaces that are filled with unfinished projects and un-used decor. Join in! What are you going to finish this week?
---------------------
We started building a pot rack in MARCH! Took a few measurements, bought the supplies in April, started with the hole drilling, and there it sat waiting to be painted all summer long. Finally I got around to it the other day. So here's my step-by-step tutorial.
Step 1: Take measurements. Decide where you want the thing to hang. Make sure it won't be hanging where anyone is likely to bang their head, nor block line of sight in the middle of a social common area. Remember that you need to measure this including the actual pots that will be hanging down! And also that it will require you to hang into joists. Now is not the time to be counting on the stability of drywall anchors.
Step 2: Purchase ingredients (are they called ingredients when it's DIY and not a recipe? I swear I'm responsible, please don't confiscate my power drill!). You will need:
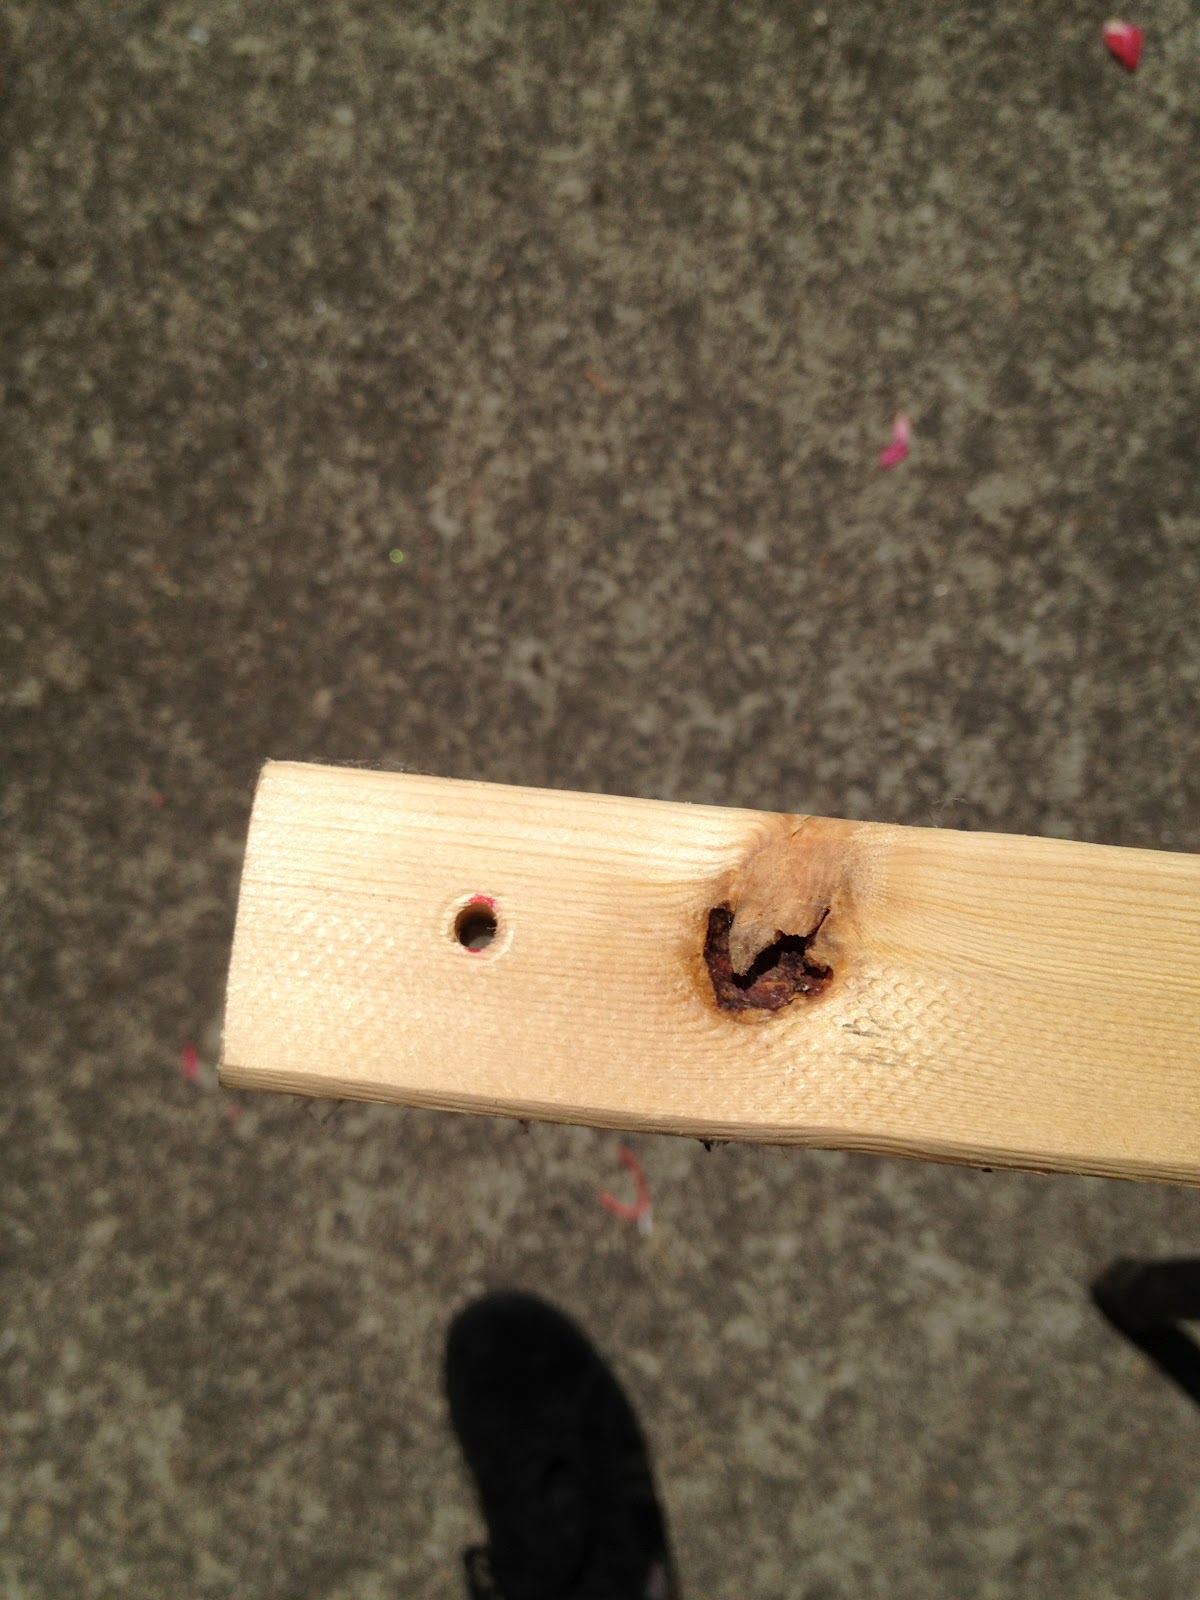
 I measured the holes for the eye bolts 1 inch in from the ends. Since the eye bolts are going all the way through, so do the holes. Then I figured out the proper placement for each of the 9 hooks, assuming:


Step 4.5: Wait 4 freaking months.
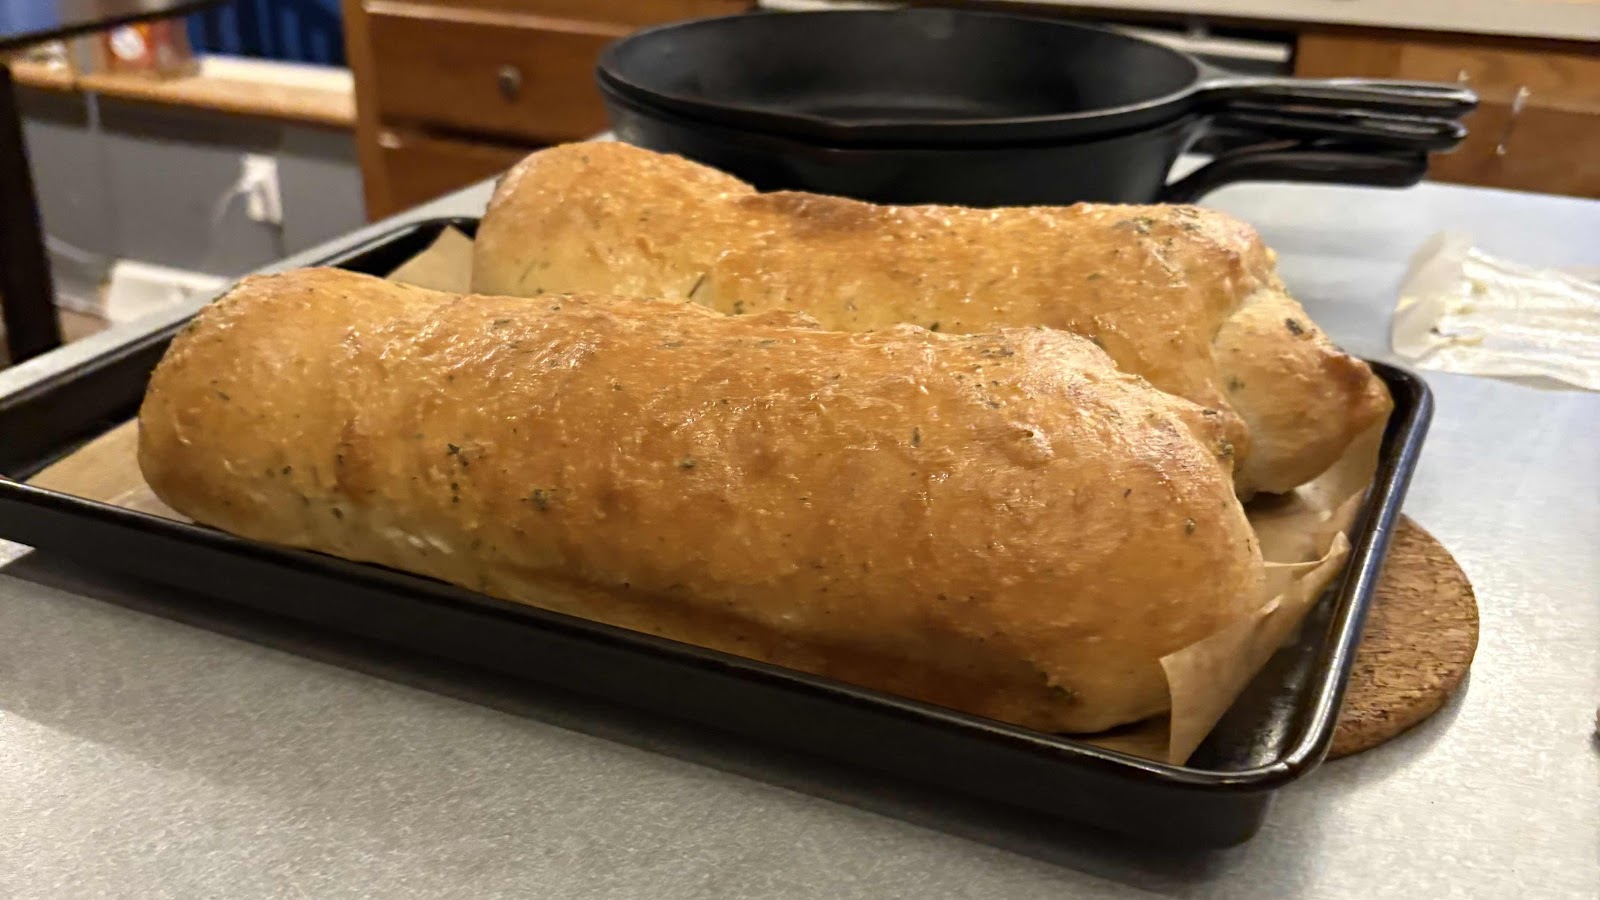
Step 5: Paint!

Now I'm going to describe to you the system to waiting the least amount of curing time between coats. I'm using latex paint, one of the mini pods from Ace hardware that covers a 4x4 area. Perfect for these kinds of projects! My internet research was confirmed by my mom, that the paint needs to cure 2-4 hours between coats. As I was painting outside and letting it cure in the sun on a hot day, I opted for 2 hours between coats. I think it could have cured longer between coats even in these conditions, so you may want to opt for closer to 4 hours. So assuming you're painting on newspaper-covered saw horses like me, you will need to:
Step 7: Cover any kitchen stuff that may get dusty from flying drywall.
 Step 8: Take one last "before" picture...
 Then hang the hooks!
Step 9: We hang the chain between the sets of hooks, and voila! It is installed! Like so:

And you can see that the door opens fully when no pots are in the way, so that should be fine.

Pots and pot holders put away! This freed up an entire huge drawer in the kitchen, and gave us someplace to hang the wok which has been living in the garage for the last 5 months and driving me batty.

It has made the kitchen seem a little smaller when you're standing in it, because there is now definitive delineation between the kitchen and the nook. It's not horrible though!
It's kind of nice.
So that's the story of my $25 pot rack.
---------------------
What have you been up to? Any projects hanging over your head that you have (or haven't) gotten finished? Any fun DIY stuff you've got going on?
---------------------
We started building a pot rack in MARCH! Took a few measurements, bought the supplies in April, started with the hole drilling, and there it sat waiting to be painted all summer long. Finally I got around to it the other day. So here's my step-by-step tutorial.
Step 1: Take measurements. Decide where you want the thing to hang. Make sure it won't be hanging where anyone is likely to bang their head, nor block line of sight in the middle of a social common area. Remember that you need to measure this including the actual pots that will be hanging down! And also that it will require you to hang into joists. Now is not the time to be counting on the stability of drywall anchors.
Step 2: Purchase ingredients (are they called ingredients when it's DIY and not a recipe? I swear I'm responsible, please don't confiscate my power drill!). You will need:
- A wooden board. Here we are using a "2x2" that is 1.25 inches square. Yes, it drives me insane too. It was purchased as an 8 foot long board, cut in half.
- Hooks! As many as you need, given appropriate spacing for the pots you want to hang. Be sure the hooks will support the pots/pans without bending, and will fit through all the holes. This project has 9 hooks.
- 2 Eye bolts: Get the ones with nuts on the end, and make sure it will go completely through the wood with room to put the nut on. Our are rated for 120 lbs each.
- 2 Ceiling hooks: Get the sturdiest ones you can find or that are reasonable. Ours are rated for 60 lbs each.
- 2 S-hooks: For connecting the chain to the eye bolts. Make sure it will fit both of these holes.
- 2 lengths of Chain: Make sure you can hook this over the ceiling hook. Get the length that you want to be between your pot rack and the ceiling when you hang. Remember you can shorten later if needbe. Get longer if you're afraid you may have measured too short. Ensure that the chain is rated at least to the weakest weight of the eye bolts and ceiling hooks. This will be a lighter-feeling weight than you think.

- 5 hooks on one side
- 4 hooks evenly spaced between those on the opposite side
* Tip: Mark one side with eyebolt holes "UP" so you don't forget which direction you need to be offsetting your hook holes.
Pot hook holes:

Eye bolt holes:
Step 4.5: Wait 4 freaking months.
Step 5: Paint!

Now I'm going to describe to you the system to waiting the least amount of curing time between coats. I'm using latex paint, one of the mini pods from Ace hardware that covers a 4x4 area. Perfect for these kinds of projects! My internet research was confirmed by my mom, that the paint needs to cure 2-4 hours between coats. As I was painting outside and letting it cure in the sun on a hot day, I opted for 2 hours between coats. I think it could have cured longer between coats even in these conditions, so you may want to opt for closer to 4 hours. So assuming you're painting on newspaper-covered saw horses like me, you will need to:
- Sand all sides, and take the sharpness off the end corners.
- Wipe down with a cloth.
- Starting with UP facing, well, UP we are going to call that side B. Paint sides A, B and C (with side D being the one resting on the sawhorse), as well as the ends.
- Cure time! Wash your brush, let it dry.
- Remove stuck on newspaper, sand, wipe;
- Rotate so that side A is down (Clean cup! Everybody move one seat down), paint a second coat on the ends, sides B & C, and a first coat on D.
- Cure time! Wash your brush, let it dry.
- Remove stuck on newspaper, sand, wipe.
- Rotate so that side B is down (Clean cup! Move down!). But a second coat on sides D & A.
- Lean against the sawhorse on one of the dried ends, so that it doesn't get newspaper stuck to it again.
- Let cure 24-48 hours.
Step 7: Cover any kitchen stuff that may get dusty from flying drywall.


Step 9: We hang the chain between the sets of hooks, and voila! It is installed! Like so:

And you can see that the door opens fully when no pots are in the way, so that should be fine.

Pots and pot holders put away! This freed up an entire huge drawer in the kitchen, and gave us someplace to hang the wok which has been living in the garage for the last 5 months and driving me batty.

It has made the kitchen seem a little smaller when you're standing in it, because there is now definitive delineation between the kitchen and the nook. It's not horrible though!
It's kind of nice.
So that's the story of my $25 pot rack.
---------------------
What have you been up to? Any projects hanging over your head that you have (or haven't) gotten finished? Any fun DIY stuff you've got going on?

Nice rack! ;)
ReplyDeleteheyyyyy yeah
Delete